
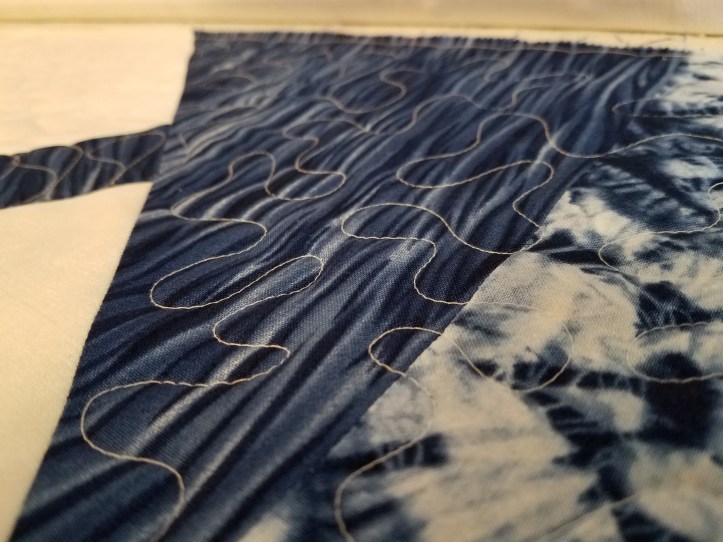
Here is a pen drawing of the three stitches I used on a quilt that I took off the frame last week. I will post a picture of the quilt after the explanation of each stitch.

I started learning free motion quilting by learning a stipple. I really focused on this shape and problem solved traveling with this fluid motion before I moved on to more difficult stitches. Whether you love or hate the stipple you need to learn this stitch because it is the basis of many foundations of the free motion quilting I do.
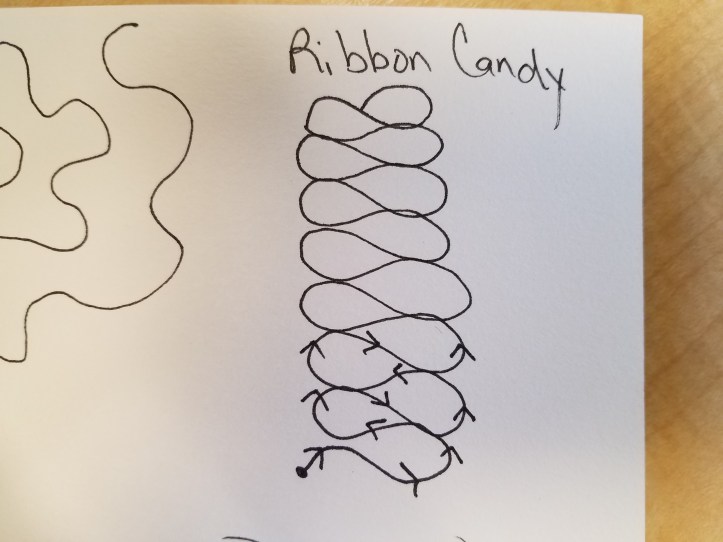
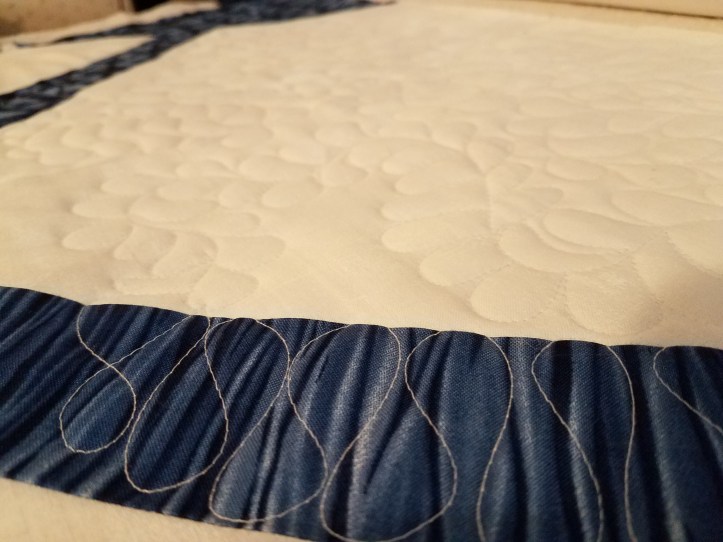
I love the ribbon candy stitch. It has a figure 8 feel. It is useful in borders!

Feathers are more challenging. I drew them out for weeks before I really was comfortable quilting them. They can be as easy as 1, 2,3.
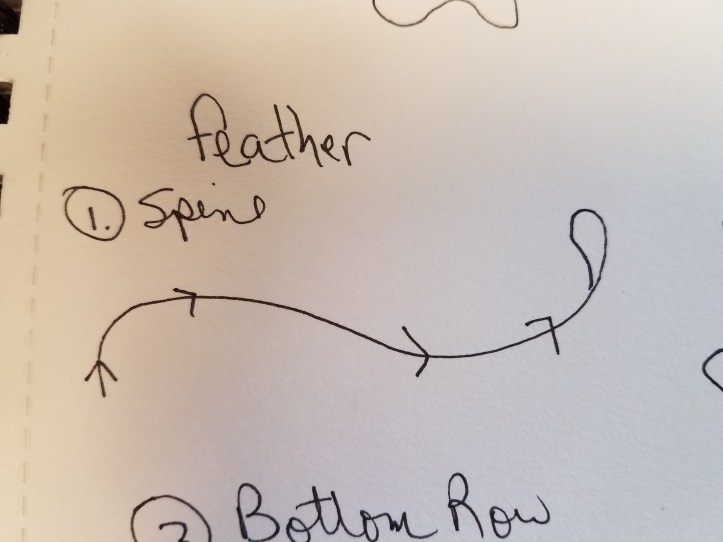
First, I start with a spine. I do all over feathers quite often using a large spaced stipple. This method can be scaled up or down as needed in your quilt. Stitch the spine and then put a feather on the end on the top of your spine.
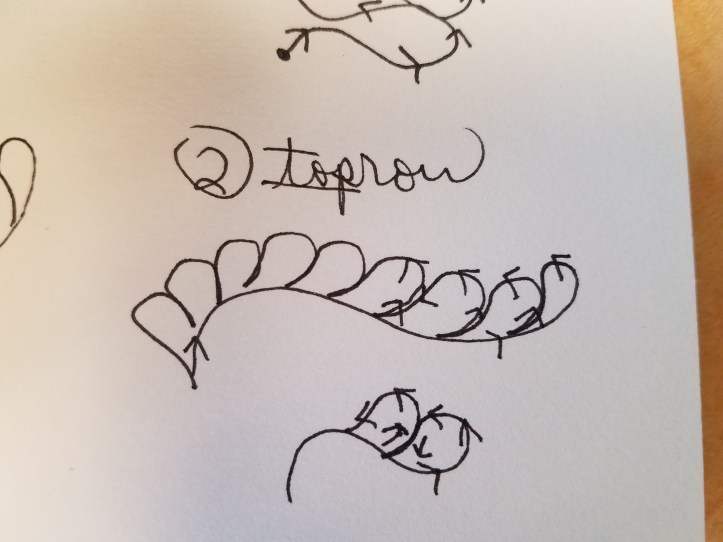 Next, make many featherss, see the arrows for “top rows” ? I try to make them teardrop shaped and make the feathers a little bit different in size depending on where it is in the curve as well as space that you need to fill. Moving right to left, fill the spine in a top to the bottom motion to make your shape.

Lastly, repeat the teardrop shape moving left to right as above only this row you are making the shape from bottom to the top.
Here are the stitches on my quilt!


Quilt on!
Vicki

[…] blocks, too! I wrote a tutorial on how I quilted this quilt with stipple, ribbon candy and feathers here. I was inspired by Angela Walters for the ribbon candy […]
LikeLike